You can also modify the user’s representatives under the “Modify Representatives” tab. To make a user the representatives of a user, click the green checkmark on the right of the list of available representatives. The red delete icon next to a representative is used to cancel the relation between the users, Click on the “Update Representative” button to save the changes
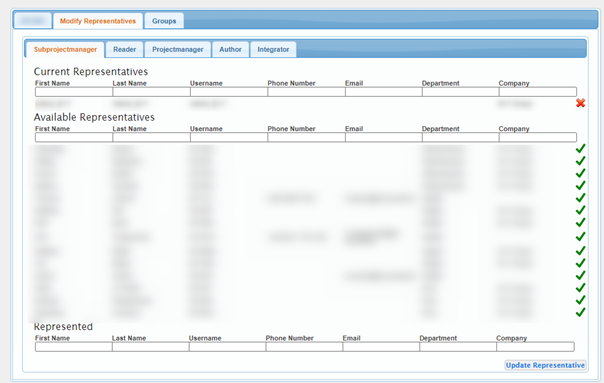
Figure 9 - Modify Representatives
The user
then has the same role as the selected users
|
Subprojectmanager |
A user who has project manager
rights within certain folders of a project |
|
Reader |
A user who has permission to read
a project |
|
Projectmanager |
A user with managing rights for a
project |
|
Author |
A user who can add content to a
project |
|
Integrator |
Momentarily not in use |
Groups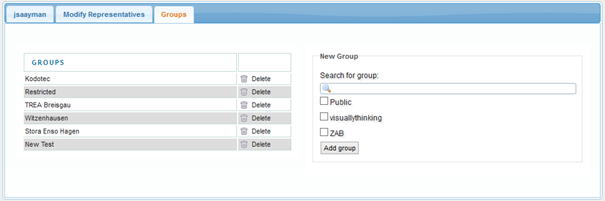
Figure 10 - Modify Users groups
Under the “Groups” tab, you can change which groups the user belongs to. On the left are the groups the user belongs to, to remove the user from the group click on the delete button next to the group. (“delete” here does not delete the group instead it removes the user from the group)
To add a user to a group, you can select the group on the right, if you can’t see the group you wish to add the user to, you can search for the group with the search field. Once you have selected the group you want to add the user to, click on the “Add group” button